
heute möchte ich Euch zeigen, wie man ein Galerieboard ganz einfach selber bauen kann.
Wie ich es gemacht habe, seht Ihr auf den nachfolgenden Bildern.
Viel Spaß beim nachbauen.

Man nehme zwei Bretter......
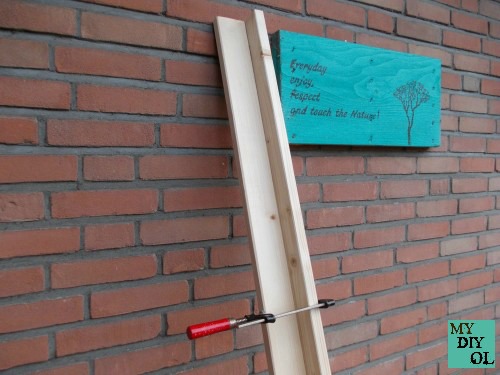
und klemmt diese mit Schraubzwingen fest, so das ein rechter Winkel entsteht.
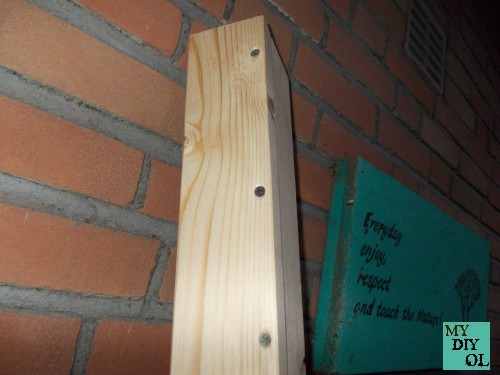
Dann kann man die Bretter zusammenschrauben.
Anschließend wird das Board an die Wand geschraubt.
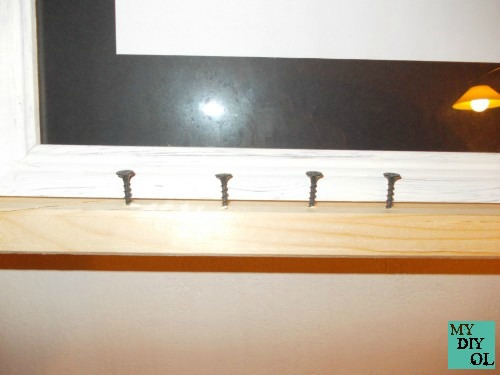
Damit die Bilder oder andere Gegenstände nicht runter fallen können, habe ich Schrauben in das waagerechte Brett geschraubt. Für mich ist das ok. Man kann aber auch statt Schrauben eine Holzleiste anbringen, oder etwas anderes. Jeder gerne wie er es mag.
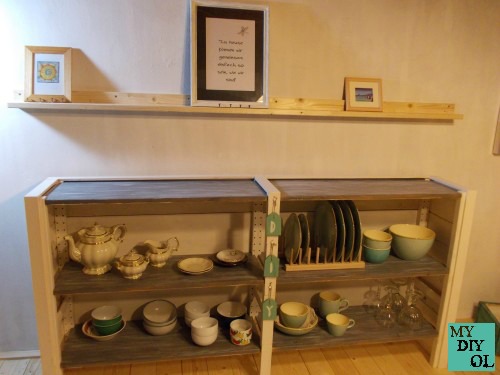
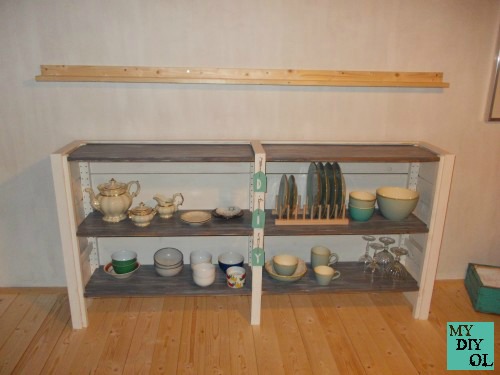
Hier seht Ihr das Endergebnis.Ich finde so ein Board gut, und es ist was anderes als immer Bilder nur an die Wand hängen.

Link up to these great parties : PJ 320 , Cooking and Crafting with J & J Link Up , Hearth and Soul Hop Link Party March 7 , Homemade and Handcrafted Party No. 15 , Talk of the Town Link Party #10 , Share Your Cup Thursday #188 , FridayFrivolity LINKY , DIY Crush Party #23 , Friday’s Five Features ~ No. 131 , CREATE SHARE INSPIRE {LINK PARTY #20}
This looks so great! What a neat idea!
AntwortenLöschenThanks for joining Cooking and Crafting with J & J!
Thank you for your kind words!
Löschengreetings
Uwe
You have made this look very easy and it would not cost much either :)
AntwortenLöschenThank you for your kind words!
Löschengreetings
Uwe
You made this look very easy, and it is so effective.
AntwortenLöschenAmanda. #weekendblogshare
Thank you for your kind words, Amanda!
Löschenmany greetings
Uwe
I like your gallery board.
AntwortenLöschenthanks for sharing at SYC.
Thank you so much!
Löschenmany greetings
Uwe
You look like it is just easy thanks for sharing with Hearth and soul blog hop, pinning
AntwortenLöschenThank you for your kind words and pinning,Swathi!
Löschenmany greetings
Uwe
Thanks for sharing over at the DIY Crush Craft Party. Love the finished product. The shelves look great! We've added this to our Pinterest board. Don't forget to stop by on Thursday to add your tutorials to our next craft party!
AntwortenLöschenThank you so much for your kind words!
Löschenmany greetings
Uwe
Lovely project!! Thanks for sharing at #FridayFrivolity! :)
AntwortenLöschenThank you so much, Sarah Eliza!
LöschenHave a great time
Uwe
Wow you make this look very easy. Fantastic job. Thank you for sharing.
AntwortenLöschenThank you so much, Kelly!
Löschenmany greetings
Uwe