
heute möchte ich Euch zeigen, wie man Topfuntersetzer aus Holz ganz einfach selber machen kann.
Ich habe Reste von meinen Rauhspundbrettern und Leisten genommen.
Der Clou an der Sache ist, das man sie einzeln für kleine Töpfe oder zusammengesteckt für große Töpfe, Pfannen und Bräter benutzen kann.
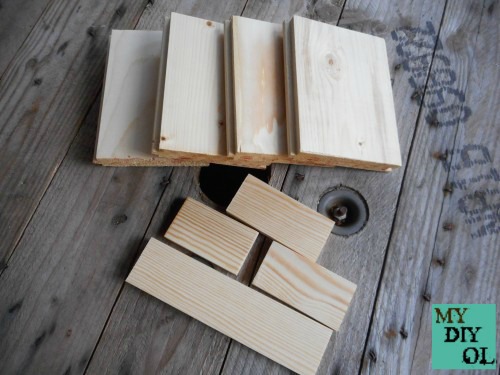
Reste von Rauhspundbretter und Leisten
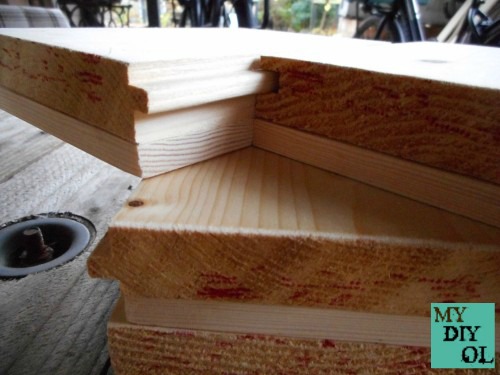
Rauhspundbretter haben Nut und Feder
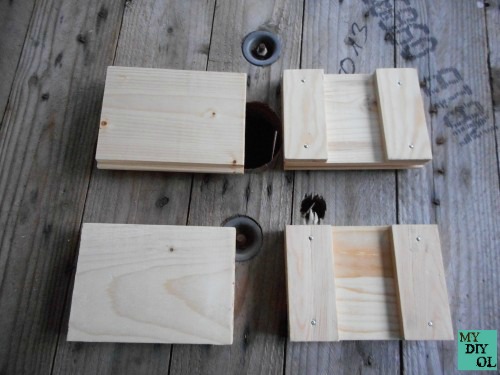
Hier könnt Ihr sehen wie ich die Leisten auf den Unterseiten mit Nägeln befestigt habe. Das habe ich mit allen gleich gemacht.
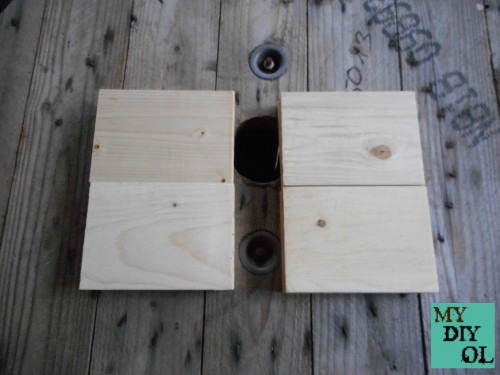
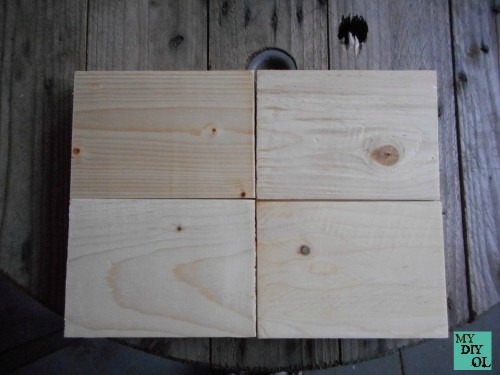
So kann man die Topfuntersetzer einzeln benutzen, ineinander gesteckt als zweier, oder zwei zweier nebeneinander als einen großen.
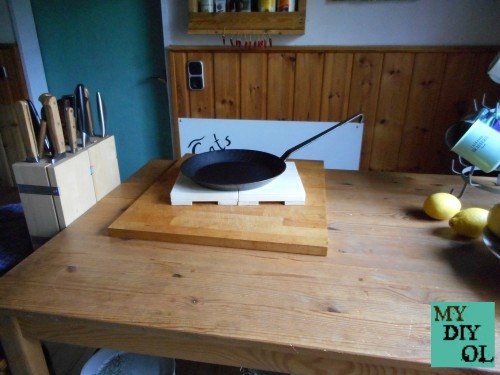
So würde es aussehen, wenn eine große Pfanne draufsteht.
Ein Tip : Man sollte darauf verzichten, die Oberflächen zu streichen, da sonst von den heißen Töpfen ect. die Farbe gesundheitsschädliche Gase ausdünsten kann.
Zum versiegeln der Oberfläche kann man sie z. B. mit Olivenöl einreiben.
Mit der Zeit der Verwendung entstehen dann individuelle Gebrauchsspuren.
Gefällt Euch diese Idee?

Link up to these great parties: Friday Frivolity link-up blog party!! , Friday Funday 26 Blog Hop , Create - Share - Inspire ~ Link Party #5 , Friday’s Five Features ~ No. 117 , PJ 305 – an upcycled link party , Your Inspired Design Link Party #11 , DIY Craft Party To Link Up Your DIY’s #7 , Home Sweet Home #246 , My Favorite Things #145 , Inspiration Spotlight Linkup Party 170 , What to so Weekends #148 , Sundays at Home Week 83 , Inspired By You , The Hearth and Soul Hop November 16 , Cooking and Crafting with J & J #25 , TABLE IT LINK PARTY #70
I love homemade items like this :) And thanks for linking up! #FridayFrivolity
AntwortenLöschenHello Alexandra,
Löschenthank you so much for your nice words!
many greetings
Uwe
This is so creative Uwe. You made something beautiful from a few pieces of wood. They could almost be sculpture!
AntwortenLöschenHello Mary,
Löschenthank you so much for your nice comment!
many greetings
Uwe
Hi Uwe, I love the simplicity and functionality of this project. Pinned to my diy board. Maybe I can get someone handy to make one for me. If I could only use a saw myself ;) Thanks again for sharing at the Inspiration Spotlight party. Have a good week ahead.
AntwortenLöschenHello Theresa,
LöschenThanks for the nice comment.
You'll definitely someone who can make you what.
Or you procure a saw and wood, and learn it.
Try it just once.
many greetings and a good week
Uwe
I like this. It's attractive and useful. You used those bits and pieces of wood very creatively -- save the environment!
AntwortenLöschenHello Ann Marie,
Löschenthank you for your kind words!
My wife and I try as little as possible to buy new and to make useful things yourself in order to protect the environment.
Everyone should play its part.
Many greetings
Uwe
Beautiful and useful, what a great combo! I love the look of natural wood. Thank you so much for linking up to our first Inspired By You link party, we hope to see you back every Sunday! Have a great week.
AntwortenLöschenHelo Kimm,
Löschenthank you s much for the nice comment!
many greetings
Uwe
Nice idea!! Thanks for sharing at Home Sweet Home!
AntwortenLöschenThank you!
Löschengreetings
Uwe
Definitely a neat idea!
AntwortenLöschenThanks for joining Cooking and Crafting with J & J!
Thank you, Jess!
Löschengreetings
Uwe
Thanks for sharing this wonderful idea with us at Cooking and Crafting with J & J.
AntwortenLöschenWe hope to see you again!
Thank you for your nice words, Julie!
LöschenYou see ms again.
many greetings
Uwe
Ganz tolle Idee!! Sehr gute Instruktionen!! Hallo aus den USA von einer Landsmaennin! :) Danke fuers vorbeikommen auf meiner DIY Crush Party!!
AntwortenLöschenHallo,
Löschendas freut mich aber.....
Vielen Dank für Deine netten Worte.
Ich komme gerne wieder.
Viele Grüße
Uwe
Da hast du ja mal wieder eine tolle Idee umgesetzt. Vor allem die Kombinierbarkeit ist originell und nützlich. Gefällt mir sehr!
AntwortenLöschenLiebe Grüße
Karin
Hallo Karin,
Löschenvielen Dank.....
Es muß nicht immer neu gekauft werden, finde ich.
Die sind einfach, funktionell und hat nicht jeder.
Viele Grüße
Uwe
Great DIY! Thanks for sharing at Friday Frivolity! :)
AntwortenLöschenHello Sarah Eliza,
Löschenthank you so much!
many greetings
Uwe
Thank you so much for linking up at Create • Share • Inspire and we hope to see you back this week!
AntwortenLöschenxo
Thank you Alicia!
Löschengreetings
Uwe
What a beautiful trivet! Your tutorial is excellent and makes this project look really do-able. This would make a fantastic homemade Christmas gift. Thank you so much for sharing this project with us at the Hearth and Soul Hop.
AntwortenLöschenHello April,
Löschenthank you so much for your nice words!
Have a great time!
many greetings
Uwe
What a beautiful trivet / chopping board. Your tutorial is so easy to follow it almost makes me believe that i could do it. (My record for handicrafts is not good!) Thank you for sharing
AntwortenLöschenThank you for your kind words!
LöschenThat you can determine!
Courage and just try it!
I would then like to see.
Many greetings
Uwe